# Add domains
Domains offer a way to group entities into hierarchical units. You can group by product area, functionality, systems, business units, or something unique to your organization. With this feature, you can cluster entities into a single, hierarchical domain that can include both parents and children.
You can define a list of other entities as children for a domain, allowing you to represent a hierarchy of how your entities are modeled across your workspace. This hierarchy is available to view in the Domains catalog, on a domain entity's details page, and in the [relationship graph](https://docs.cortex.io/ingesting-data-into-cortex/entities/relationship-graph). The domain hierarchy can also be used to configure ownership inheritance, helping you keep track of ownership in case of personnel changes at your organization.
## Viewing domains
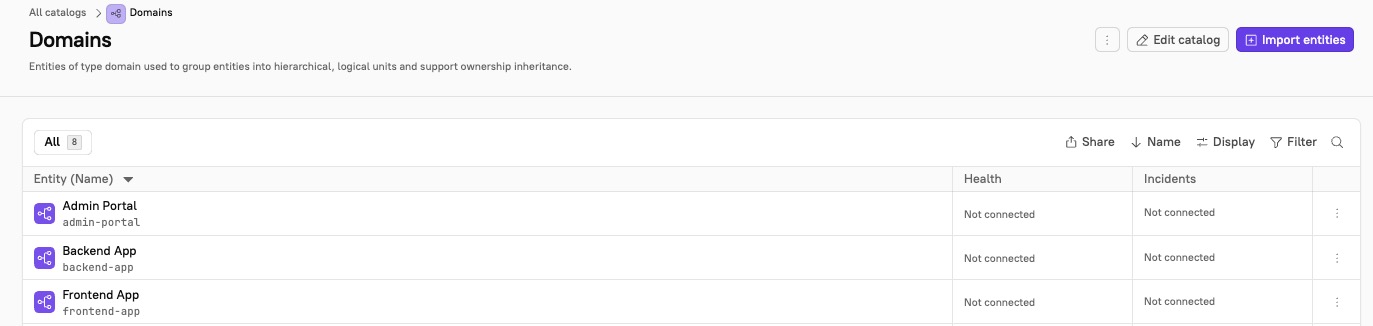
You can view all domains under **Catalogs > Domains**.
View all domains in the Domains page.
### Display in hierarchy
To display domains in a hierarchy:
1. Click **Display** at the top of the domains list.
2. Enable to toggle next to **Display hierarchy**.\

3. Click **Done**.
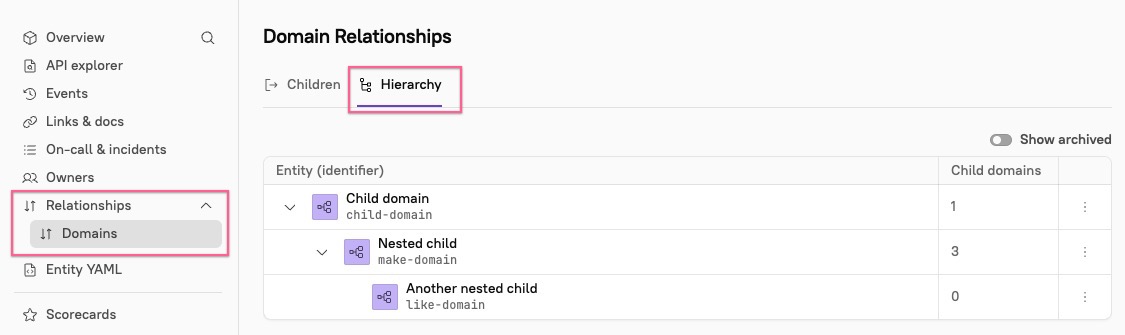
You can also view the hierarchy for a given domain on its [entity details page](https://docs.cortex.io/ingesting-data-into-cortex/entities/details). If the domain has parents or children, those will appear on the Relationships page.
In the entity's side bar, click **Relationships**, then click the **Hierachy** tab.
The hierarchy appears in a domain's "Relationships" section.
### View in relationship graph
At the top of the domain, click **View in domains tree** to visualize your domain hierarchy in the [relationship graph](https://docs.cortex.io/ingesting-data-into-cortex/entities/relationship-graph).
## Creating domains and a hierarchy
You can create domains:
* By importing them from a connected integration
* Manually in the Cortex UI
* Via the entity descriptor YAML through [GitOps](https://docs.cortex.io/configure/gitops)
* Via the [API](https://app.gitbook.com/s/nPgS8L9MAPtoOtdWdeDp/readme/catalog-entities#post-api-v1-open-api)
For simplicity, we recommend adding the highest-level domain first and then selecting it as the parent for subsequent domains. However, you can add parents and children to any domain at any point.
{% tabs %}
{% tab title="Import" %}
**Importing domains**
You can import domains directly from third-party integrations:
1. In Cortex, navigate to **Catalogs > All entities**, then click **Import entities**.
2. Choose **Import discovered entities**.\

3. Select the integration to import from.
4. On the following page, after the integration sync is complete, a list of entities from the integration are displayed. Check the boxes next to any entities you want to import.\

* If you have a large volume of entites, click **Filter** in the upper right corner of the results list to select and apply entity type filters.
5. At the bottom of the page, click **Next step**.
6. Edit the details for the entity:
* **Type**: Select **Domain**.
* **Entity name**: Enter a human readable name.
* **Identifier**: This field is auto-populated based on your entity name. It is a unique identifier for your entity. This is also known as the `x-cortex-tag`.
* **Description**: Enter a description of the entity to help others understand its purpose.
* **Groups**: Optionally select [groups to segment](https://docs.cortex.io/ingesting-data-into-cortex/entities/groups) your entity.
* **Owners**: Define ownership for your entity. We recommend selecting team owners to keep your ownership information up-to-date through any future personnel changes. You may see owners that Cortex [recommends based on repository activity](https://docs.cortex.io/ingesting-data-into-cortex/ownership#recommendation). You can accept or reject the recommendations.
* When adding an owner, you can also configure one of the following inheritance options:
* **Append**: Select this option to add your entity as an additional owner to all of its child entities.
* **Fallback**: Select this option to add your entity as an owner to child entities if the child entity has no other valid owners.
* **None**: Select this option if you do not want to configure inheritance. The owner will own the domain you are creating, but will not be configured as an appended or a fallback owner.
* **Parents and Children**: Define parent and children domains. This is where you configure the hierarchy for your domain. These can be visualized in the [relationship graph](https://docs.cortex.io/ingesting-data-into-cortex/entities/relationship-graph).
* **On-call**: Configure on-call information.
* **Repository**: Select the repository associated with this entity.
* When you are finished, click **Confirm import** at the bottom of the page.
7. If you selected more than one entity: After the first entity is configured, click the name of the next entity on the right to navigate to the detail editor for that entity.\

8. Click **Confirm import**.
{% endtab %}
{% tab title="Manual" %}
**Manually creating domains**
1. In the main nav of Cortex, click **Catalogs > Domains**.
2. At the top of the Domains page, click **+Import entities**.
3. Choose **Create entities manually**.\

4. Configure the form:
* **Type**: Select **Domain**.
* **Entity name**: Enter a human readable name.
* **Identifier**: This field is auto-populated based on your entity name. It is a unique identifier for your entity. This is also known as the `x-cortex-tag`.
* **Description**: Enter a description of the entity to help others understand its purpose.
* **Groups**: Optionally select [groups to segment](https://docs.cortex.io/ingesting-data-into-cortex/entities/groups) your entity.
* **Owners**: Define ownership for your entity. We recommend selecting team owners to keep your ownership information up-to-date through any future personnel changes.
* When adding an owner, you can also configure one of the following inheritance options:
* **Append**: Select this option to add your entity as an additional owner to all of its child entities.
* **Fallback**: Select this option to add your entity as an owner to child entities if the child entity has no other valid owners.
* **None**: Select this option if you do not want to configure inheritance. The owner will own the domain you are creating, but will not be configured as an appended or a fallback owner.
* **Parents and Children**: Define parent and children domains. This is where you configure the hierarchy for your domain. These can be visualized in the [relationship graph](https://docs.cortex.io/ingesting-data-into-cortex/entities/relationship-graph).
* **On-call**: Configure on-call information.
* **Repository**: Select the repository associated with this entity.
5. When you are finished, click **Confirm import** at the bottom of the page.
{% endtab %}
{% tab title="Entity descriptor" %}
The hierarchy of entities in Cortex is based on that hierarchy being defined in the entity's YAML file; Cortex does not set hierarchies based on a YAML file's location in your repository.
**Domain entity descriptor**
If your entity is a domain, you must specify `x-cortex-type` as `domain`:
```yaml
openapi: 3.0.1
info:
title: Payments
description: This is my cool domain.
x-cortex-tag: payments-domain
x-cortex-type: domain
```
**Domain hierarchies**
These can be defined in two ways:
* From the parent entity YAML
* Define children entities using the `x-cortex-children` tag in the parent entity YAML.
* From the child entity YAML
* Define parent entities using the `x-cortex-parents` tag in the child entity YAML.
While defining these relationships top-down (on the parent entity) or bottom-up (on the child entity) will both result in a hierarchy, you may choose one or the other depending on your workflow. For example, if you are frequently making changes to a group of children domains, it may be more efficient to have the children defined on the parent YAML.
**Domain children**
Define a list of other entities as children for a domain, allowing you to represent a hierarchy of how your entities are modeled across your workspace using the `x-cortex-children` tag.
```yaml
openapi: 3.0.1
info:
title: Payments
description: This is my cool domain.
x-cortex-tag: payments-domain
x-cortex-type: domain
x-cortex-children:
- tag: child-domain-1
- tag: child-service-1
- tag: child-resource-1
```
**Domain parents**
Define another entity as the parent for a domain, allowing you to represent a hierachy of how your entities are modeled across your workspace using the `x-cortex-parents` tag.
```yaml
openapi: 3.0.1
info:
title: Payments
description: This is my cool domain.
x-cortex-tag: payments-domain
x-cortex-parents:
- tag: parent-domain-1
- tag: parent-domain-2
```
Note: Parents must be of type `domain`.
**Ownership inheritance**
A common use case for domains is defining ownership for the subtree of entities. Instead of defining ownership individually for every entity in your catalog, you can define ownership at the domain level and have that pass down to all of its children.
```yaml
openapi: 3.0.1
info:
title: Payments
description: This is my cool domain.
x-cortex-tag: payments-domain
x-cortex-type: domain
x-cortex-owners:
- type: GROUP
name: cortexapps/engineering
provider: GITHUB
inheritance: APPEND
```
The `inheritance` type for each owner can be one of `APPEND`, `FALLBACK`, or `NONE`. If not set, inheritance is defaulted to `NONE`.
* `APPEND`: This owner is appended to the list of owners for all child entities.
* `FALLBACK`: In the case where a child has no valid owners, including fallbacks, this fallback will be assigned as the owner. Note that this only applies to a child entity down the hierarchy; it is not the fallback for the parent domain itself.
* `NONE`: This owner owns the domain, but not necessarily any of its children (no inheritance).
**Example cortex.yaml**
Note: the YAML definition for a domain entity can take file names other than `cortex.yaml` or `cortex.yml`; see the [GitOps example repository structure](https://docs.cortex.io/configure/gitops#how-gitops-works-in-cortex).
```yaml
openapi: 3.0.1
info:
title: Chat
description: Chat domain.
x-cortex-tag: chat-domain
x-cortex-type: domain
x-cortex-children: # children can be of type service, resource, or domain
- tag: chat-service
- tag: chat-database
x-cortex-parents: # parents can be of type domain only
- tag: payments-domain
- tag: web-domain
x-cortex-owners:
- type: group
name: Support
provider: OKTA
description: Support Team
x-cortex-slack:
channels:
- name: support-team
notificationsEnabled: true
description: This is a description for the support-team Slack channel # optional
x-cortex-oncall:
pagerduty:
id: ASDF2345
type: SCHEDULE
x-cortex-apm:
datadog:
monitors:
- 23456
```
{% endtab %}
{% tab title="API" %}
**Creating domains via the API**
You can create, update, and delete domains using the [Cortex API](https://app.gitbook.com/s/nPgS8L9MAPtoOtdWdeDp/readme/catalog-entities).
{% endtab %}
{% endtabs %}
## Edit domains
It is possible to edit entities after creating them:
1. Navigate to the entity's page.
2. In the upper right corner, click **Configure entity**.
3. Make any desired changes.
* Note: The only field you cannot edit is the identifier.
4. At the bottom of the screen, click **Save changes**.
## Adjusting domain settings
Under [**Settings > Entities > Domains**](https://app.getcortexapp.com/admin/settings/entities/domains), you can enable automatic import of domains and domain relationships from [ServiceNow](https://docs.cortex.io/ingesting-data-into-cortex/integrations/servicenow).