Creating a plugin
Plugins enable Cortex users to pull data into their Cortex instance from any source, expose custom metrics, and customize the UI to match other internal tools.
A plugin is a React application that is executed in Cortex. It uses a plugin proxy to send requests from the plugin to a third party.
How to create a Cortex plugin
Users with the Edit plugins permission can create a plugin.
Step 1: Create a plugin code repository from the Scaffolder template
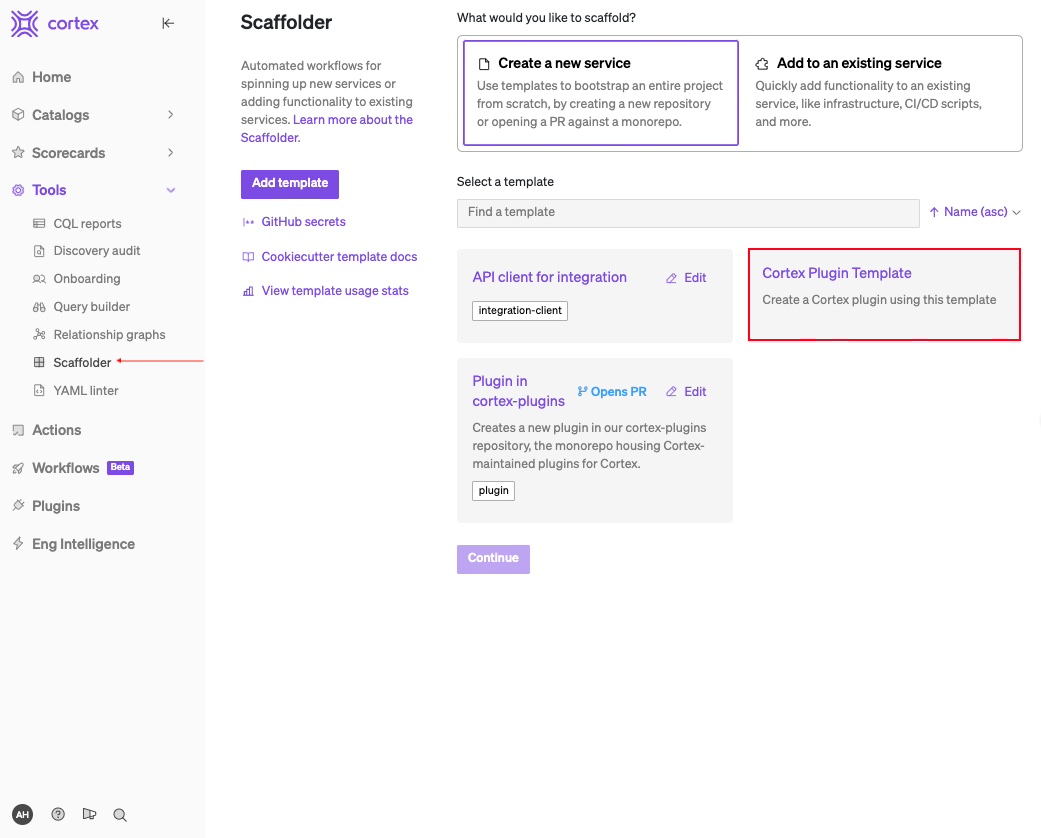
- In Cortex, navigate to Tools > Scaffolder.
- Click Cortex Plugin Template, then click Continue.

- Configure the template:
- Project Name: Enter a name for your plugin.
- License: Enter the license for your plugin.
- Choose whether to Create a new repo or Open a pull request against an existing repo. Through the Scaffolder, Cortex can automatically set up a React + TypeScript repository for you with the basic setup for your plugin to make it easy to get started.
- If you create a new repo:
- Repo org: Select an organization from the dropdown.
- Repo name: Enter the name of the repo that will be created to hold this service.
- Branch: Enter the name of the target branch that will be used as the default for the service.
- Advanced configuration: Optionally, you can add encrypted GitHub secrets for other users in your organization to use during the service creation flow.
- If you open a pull request:
- Repo: Enter the name of the repo the pull request will be opened against.
- Branch to create: Enter the name of the branch where the generated code will be pushed.
- Subdirectory: Enter the name of the subdirectory where the generated service will live.
- If you create a new repo:
- Configure the service for your plugin:
- Name: Enter a human readable name.
- Identifier: Enter a unique identifier for the service.
- Optionally configure a description, groups, owner, and dependencies.
- Click Create service.
Step 2: Clone the repository and install dependencies
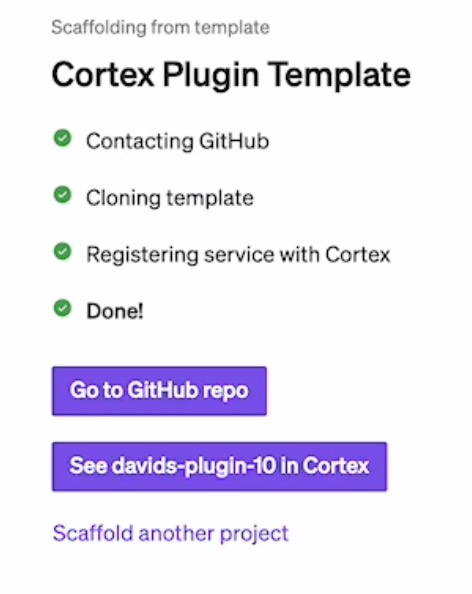
After you create the plugin from the Scaffolder template, you will be redirected to a status page for the plugin creation.
- On the plugin status page after creating your plugin, click the button to open your repository.

- Clone the repository locally.
- Install dependencies via
yarn.- You can also use
npmcommands if preferred.
- You can also use
- Run
yarn buildto generate a single HTML file representing your plugin (output at./dist/ui.html).- If you want to make any changes to the plugin, modify the code before running or re-running the
buildcommand. - You will need this file in the next steps.
- If you want to make any changes to the plugin, modify the code before running or re-running the
Step 3: Register the plugin in Cortex
- Go to the Plugins page in Cortex and click Register plugin.

- Configure the plugin:
- Name: Enter a display name for the plugin.
- Tag: Enter a unique identifier for the plugin.
- Minimum user role: Select the minimum user role required to be able to see this plugin. You can choose default or custom roles.
- Note that you will not be able to delete a custom role if it is associated with a plugin.
- Associated proxy: If you have configured a proxy, select the proxy to use for proxy fetches from this plugin.
- Include in global context: Toggle this setting on if you want the plugin to appear under the All tab on the Plugins page in Cortex.
- Click Add another context if you want the plugin to appear on entity details pages. Within this setting, you can choose whether to include or exclude specific entity types to apply this plugin to.
- In the "Plugin code" section, upload the HTML file you generated from running
yarn buildin the previous steps.- Enable dev mode: Toggle on to enable dev mode. When in dev mode, the preview for your HTML file uses code running at http://localhost:9000/ui.html. To run your plugin code from this location, use
yarn devornpm run devfrom your Scaffolded plugin. - In the preview, iterate on any changes you might want to make to the plugin.
- Enable dev mode: Toggle on to enable dev mode. When in dev mode, the preview for your HTML file uses code running at http://localhost:9000/ui.html. To run your plugin code from this location, use
- Click Save plugin.
Create a plugin proxy
To access authenticated external APIs, you can configure a plugin proxy to add request headers to requests matching a URL prefix. See Creating a plugin proxy for more information.
Editing the plugin code
Users with the Edit plugins permission can edit plugins.
Enable dev mode
Optionally, you can preview your changes before implementing them:
- Navigate to your plugin in Cortex and click the edit icon.
- Next to "Plugin code" section, enable the toggle next to Enable dev mode.
- The preview will use code running at http://localhost:9000.
- From your scaffolded plugin in command line, run
yarn dev. - View the preview on the Plugin editor page in Cortex.
Edit and update the plugin
- In your text editor, open the cloned repo for your plugin.
- After making changes and saving, run
yarn build. - Optionally, run
yarn devto preview your changes in Cortex. - In the "Plugin code" section of the plugin editing page in Cortex, click Edit next to the file name. Select your newly-updated file.
- At the bottom of the page, click Save plugin.
Configure where plugins appear in Cortex
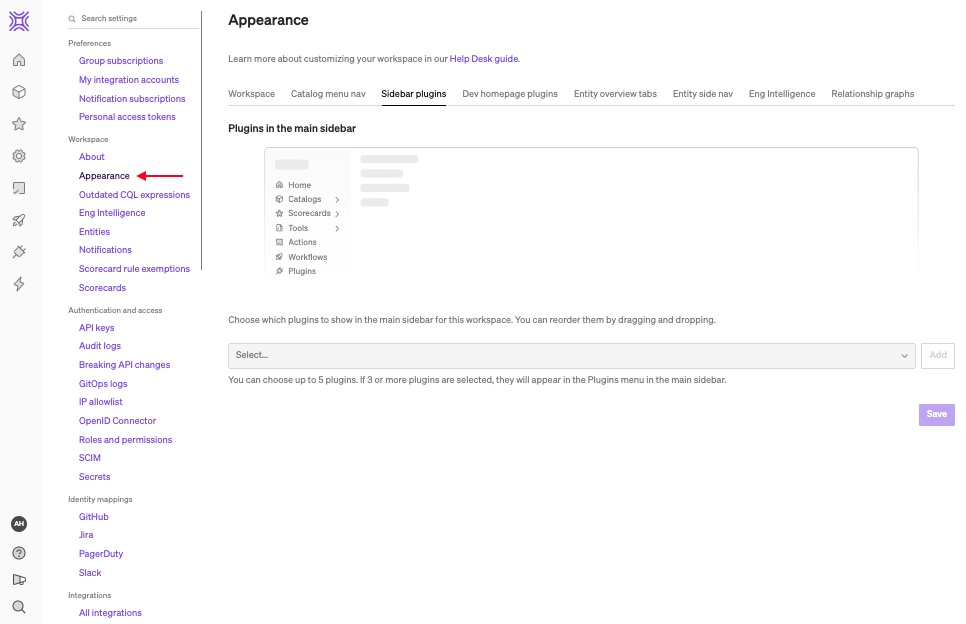
Users with the Configure plugin appearance permission can configure where plugins appear from Appearance settings.

Sidebar plugins
In the Sidebar plugins tab, you can choose up to 5 plugins to display in the main nav. If 3 or more plugins are selected, they'll be nested under the Plugins menu in the nav.
Dev homepage plugins
In the Dev homepage plugins tab, you can choose up to 3 plugins to display on the Dev homepage. If you using entity verification, these will display as tabs after Pending verifications. Otherwise, they will appear after Action items.
Entity overview plugins
In the Entity overview tabs tab, you can configure plugins to appear as tabs on an entity's overview page.
On this settings page, in the upper right corner, select Service, Resource, or Domain or Team to select which plugins should appear for each of these groupings. To add a plugin as a tab on an entity page, the plugin itself should be configured to include the entity type in its context. For example, in order to select a plugin to appear in a tab on Team entity overview pages, you must include the Team entity type when registering the plugin in Cortex.
Accessing contextual Cortex information from your plugin
The easiest way to access the plugin context is via the usePluginContext() hook.
import { Stack, Title, usePluginContext } from "@cortexapps/plugin-core/components";
import type React from "react";

const MyComponent = React.FC => () => {
  const context = usePluginContext();

  return (
    <Stack>
      <Title level={2}>Plugin context</Title>
      <pre>{JSON.stringify(context, null, 2)}</pre>
    </Stack>
  );
};

export default MyComponent;
If you need to access the plugin context outside of a React component, you can use the CortexApi class directly. The CortexAPI class exposed from @cortexapps/plugin-core provides a method for accessing the context your plugin is running in, getContext().
import { CortexApi } from "@cortexapps/plugin-core";
import types { CortexDomain, CortexResource, CortexService } from "@cortexapps/plugin-core";

// fetch information about the currently-signed-in Cortex user
const getCurrentCortexUser = async (): Promise<CortexUser> => {
  const context = await CortexApi.getContext();
  return context.user;
};

// if the plugin is running inside of a catalog entity details page, fetch information about that entity
const getCurrentCortexEntity = async (): Promise<CortexDomain | CortexResource | CortexService | undefined> => {
  const context = await CortexApi.getContext();
  return context.entity;
};
Accessing Cortex APIs from your plugin
You can access Cortex APIs using @cortexapps/plugin-core’s CortexAPI.
See the Cortex API docs for available API calls.
import { CortexApi } from "@cortexapps/plugin-core";

// fetch deploys for the current entity if the plugin is running on a domain, resource, or service details page
const fetchDeploysForCurrentEntity = async () => {
  const context = await CortexApi.getContext();

  if (!context?.entity) {
    console.warn('Attempted to fetch deploys for an entity outside of the entity context');
    return;
  }

  const { tag } = context.entity;

  const response = await CortexApi.proxyFetch(`https://api.getcortexapp.com/api/v1/catalog/${tag}/deploys`);
  return response.json();
};
Accessing external APIs from your plugin
It is also possible to access non-Cortex APIs from your plugin. Because plugins are run in an iframe, typical fetch requests often get blocked by the browser's enforcement of CORS. However, when using the Cortex-provided template, the browser fetch is shimmed to call CortexApi.proxyFetch, a method for using Cortex as a proxy to make the request. For this reason, you should be able to use fetch() as you typically would in a web application.
If your browser fetch is not getting shimmed properly, make sure that your @cortexapps/plugin-core is up to date and you're using wrapping your app with <PluginProvider>. See the cookiecutter template for an example.
Request signing
We add the following headers to each request made by Cortex:
x-cortex-timestamp(current timestamp in millis, used to prevent replay attacks)x-cortex-signaturex-cortex-signature-256
These headers can be used to verify that the request is valid and originated from Cortex.
x-cortex-signature uses the SHA1 algorithm and exists for backward compatibility. SHA1 has been cracked and this signature should be considered deprecated. It is highly recommended to use x-cortex-signature-256, which uses the SHA256 algorithm.
To calculate the signature (an RFC2104 HMAC):
1. Create a string with the value "$timestamp.$requestBody" if the request body is non-null OR "$timestamp" if the request body is null.
2. Calculate an HMAC using the SHA256 algorithm. Use the Secret you provided to Cortex as the key and the string from Step 1 as the payload.
3. Verify that the x-cortex-signature-256 matches the HMAC calculated in Step 2.
Using Cortex UI components
Cortex UI components are available for import from @cortexapps/plugin-core as of v1.1.0. You can view a Storybook of the components to see what's available, what props they take, and how they look.