Kicking off a Jenkins pipeline in a Workflow
After integrating Cortex with Jenkins, you can use the Cortex Workflows feature to kick off your pipeline directly through Cortex, rather than switching to Jenkins to launch a build.
For full instructions on creating and configuring workflows, see the Workflows documentation.
Submitting jobs without parameters
In Jenkins it is possible to submit jobs without parameters — you just need to perform an HTTP POST on JENKINS_URL/job/JOBNAME/build. If your Jenkins instance is secure, you must pass a user token to call the URL.
Submitting a job with parameters
When submitting a job with parameters, you could pass a job similar to this example:
curl JENKINS_URL/job/JOB_NAME/buildWithParameters \
--user USER:TOKEN \
--data id=123 --data verbosity=high
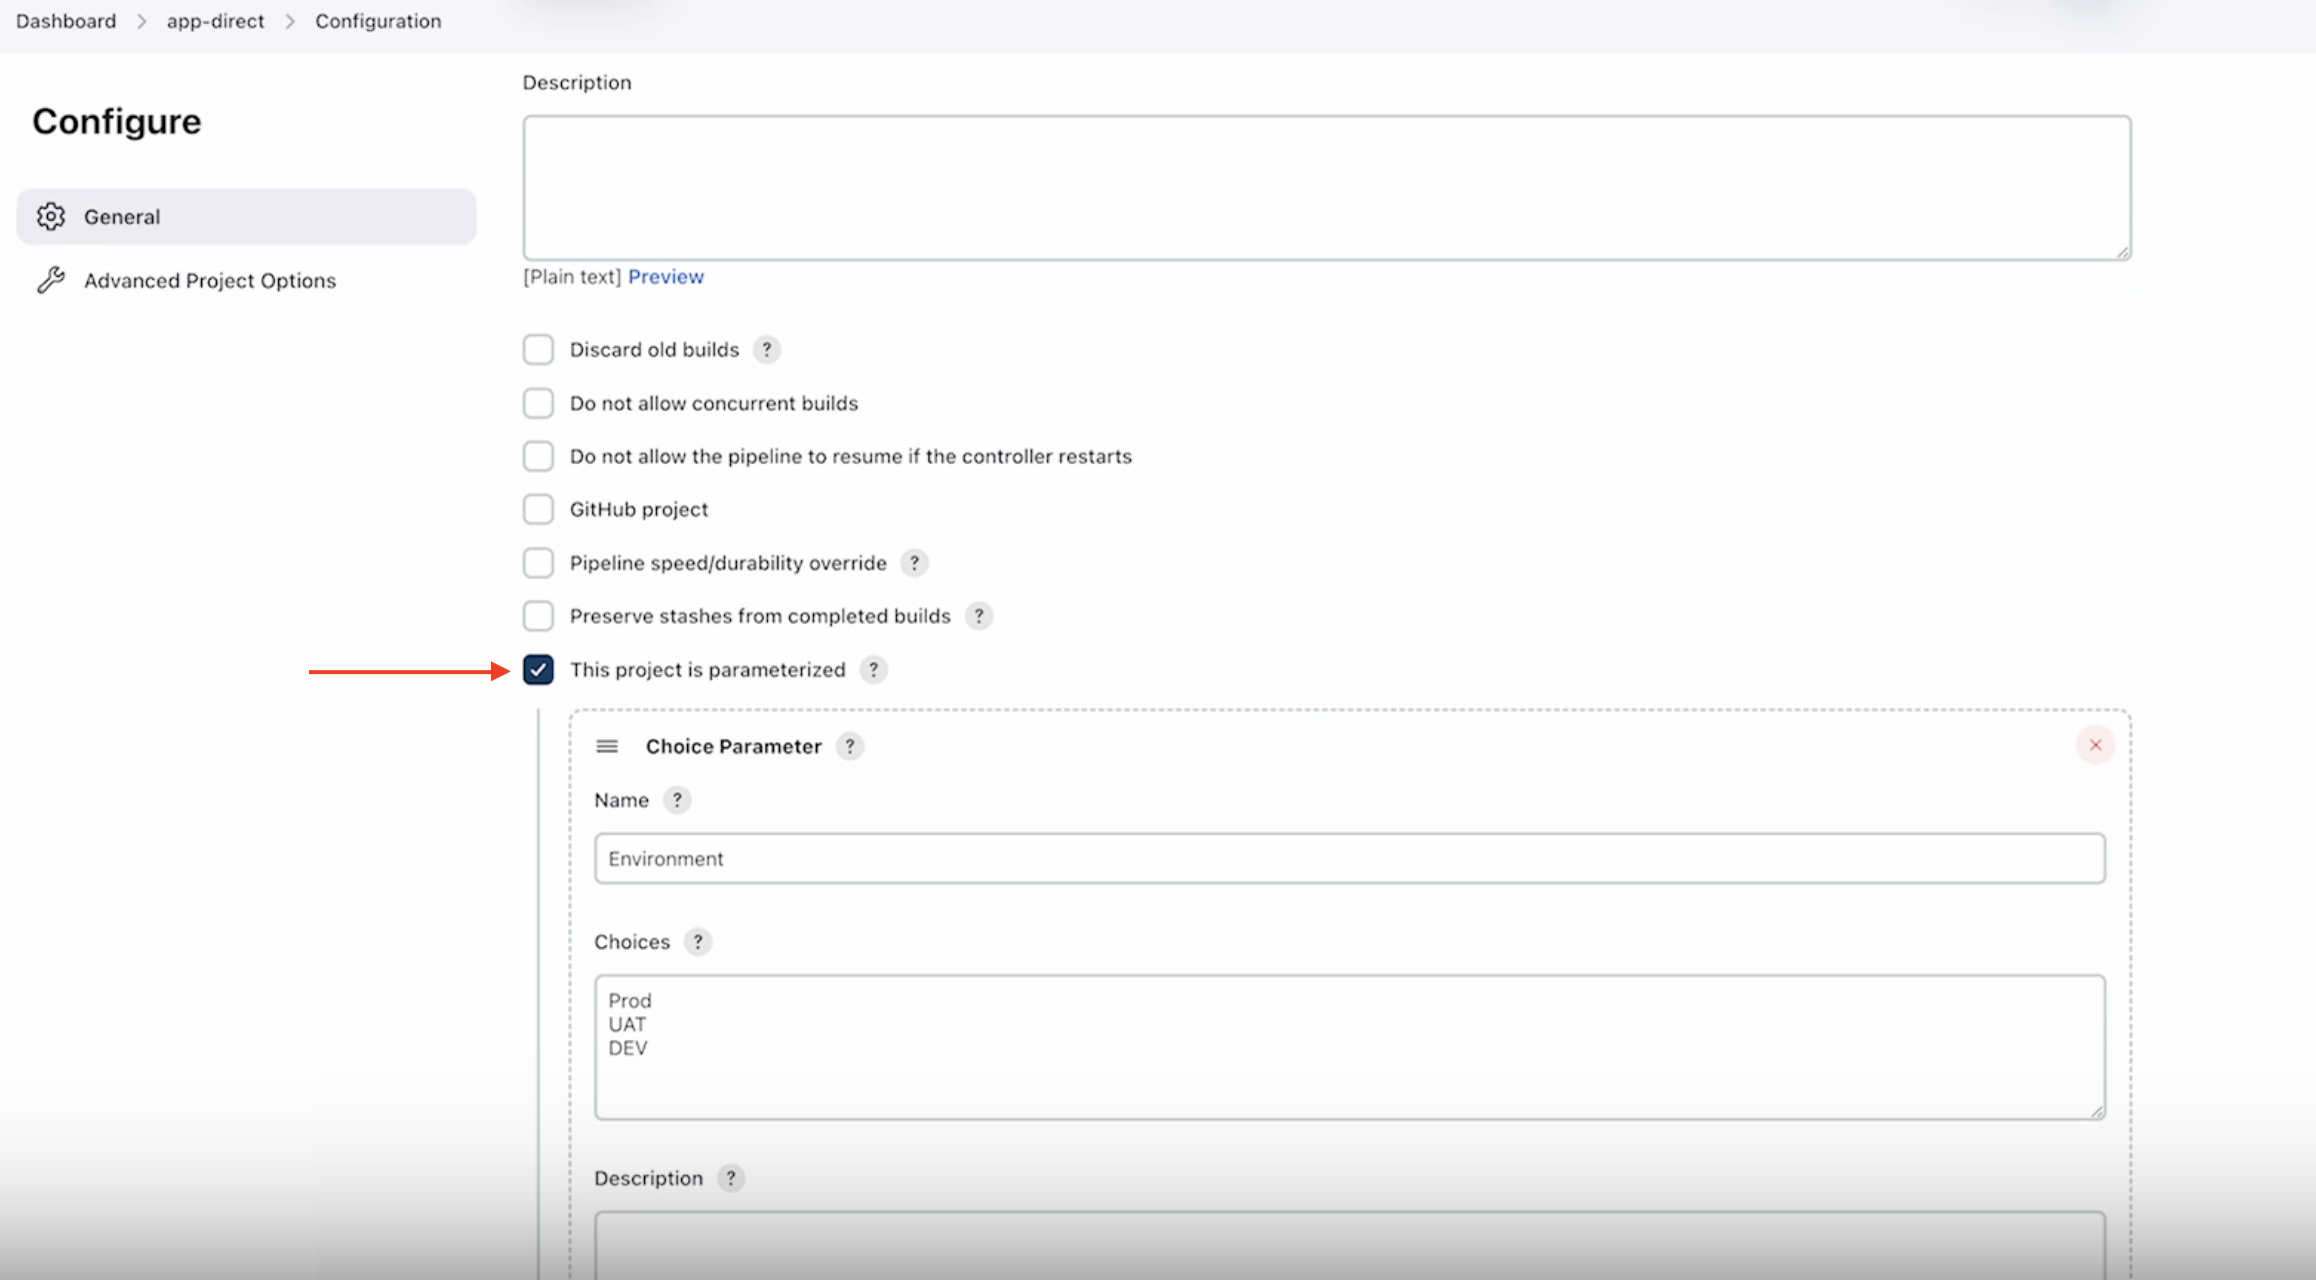
The example screen shot below is working from a parameterized Jenkins instance called app-direct. It includes a choice parameter named Environment with choices Prod, UAT, and DEV. These parameters will be used when creating the associated workflow in Cortex:
See the Jenkins documentation for more information on submitting parameterized jobs.
How to kick off a Jenkins pipeline in a workflow
Prerequisites
Before getting started:
- Generate an API token in Jenkins
- In Jenkins, navigate to user settings > Configure > API Token.
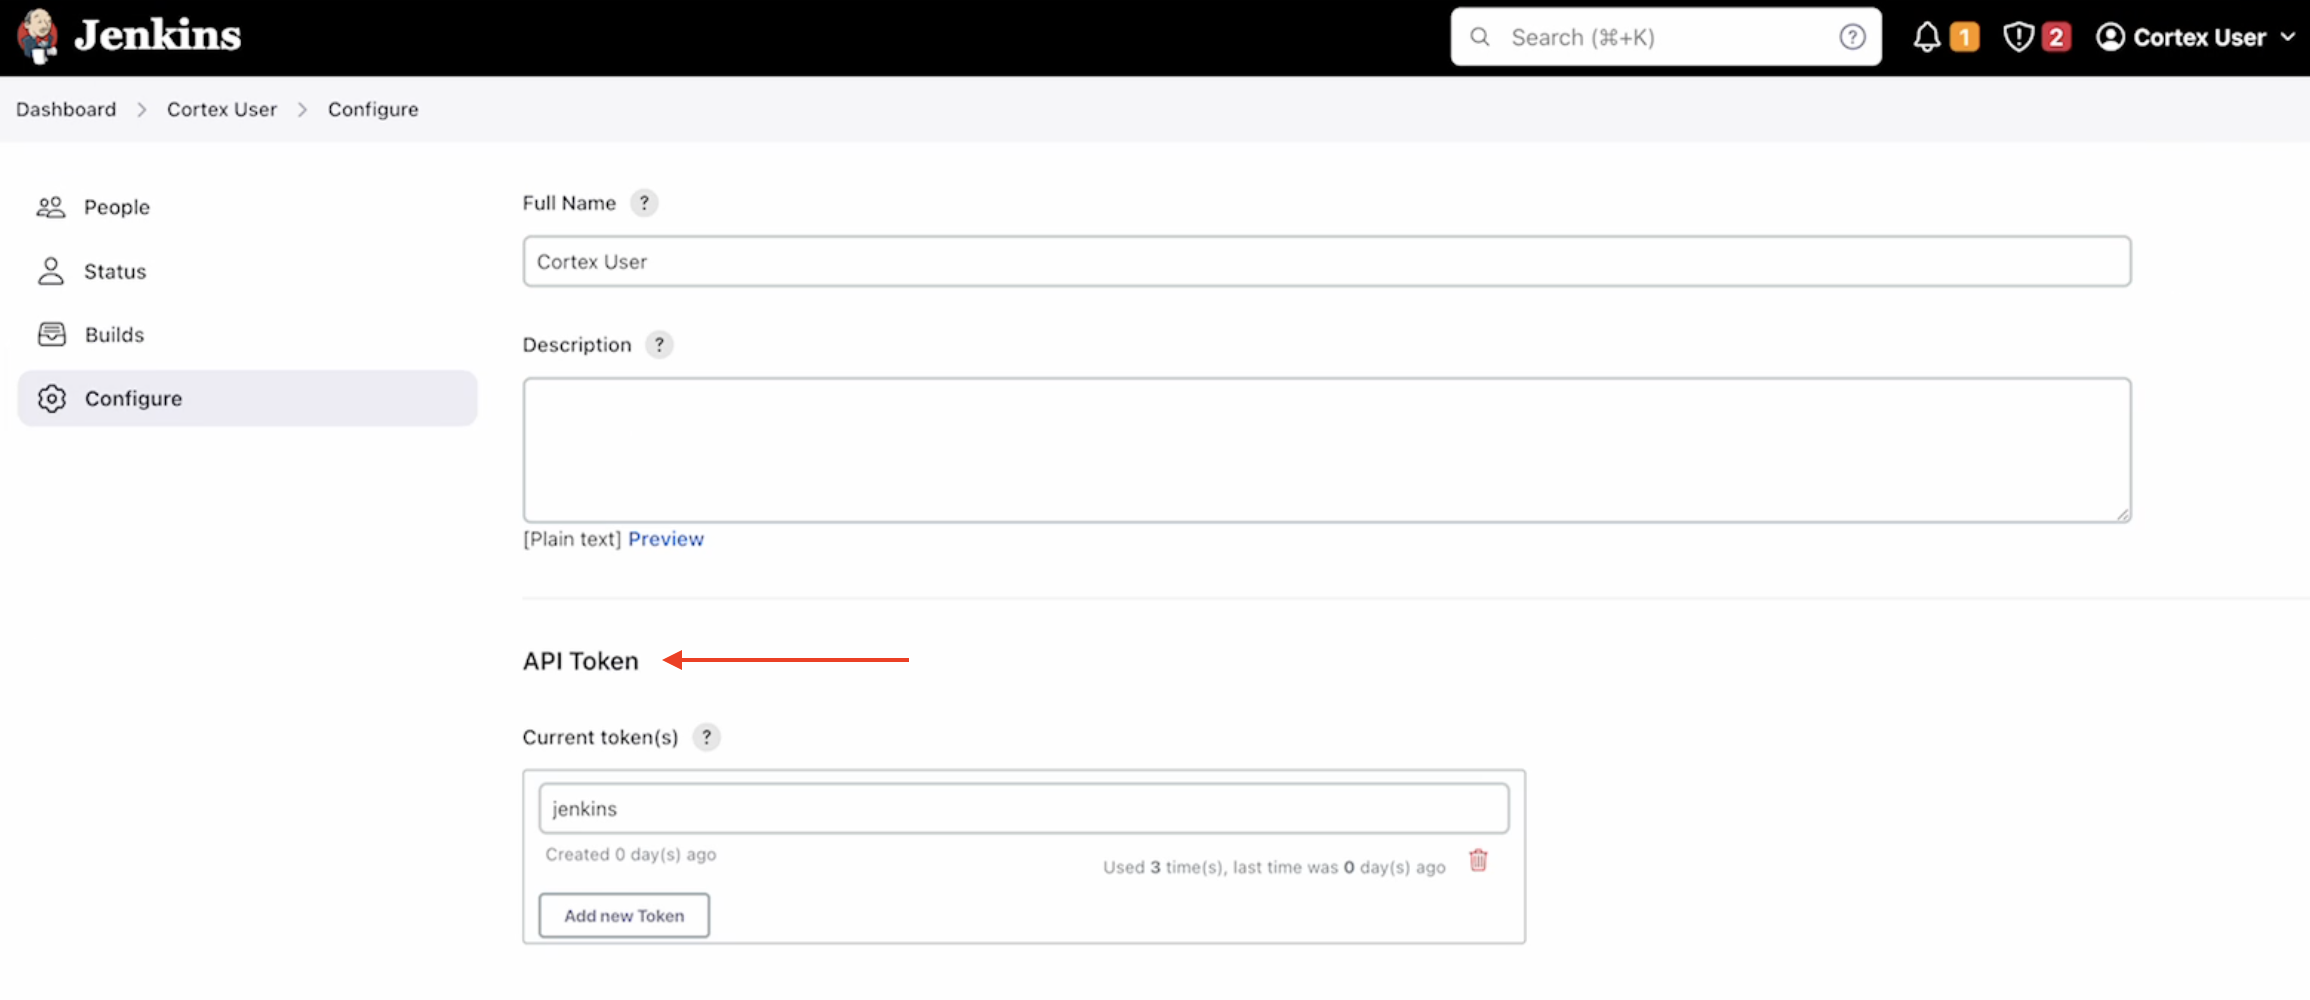
- In Jenkins, navigate to user settings > Configure > API Token.
- Generate a base64-encoded authentication header. After generating the header, copy it and store it in a secure location, as you will need it in the next step.
- You can generate the header with a command line tool or a basic authentication tool such as Mixed Analytics. If using Mixed Analytics, enter the token into their encoding tool using the format
cortex:token, replacingtokenwith the value of your Jenkins API token. - When using an authentication tool such as Mixed Analytics to generate the authentication header, do not include the equal signs that are appended to the header. For example, if the tool returns
xxxxxxxxxx6789==as the encoded header, you only need to save the valuexxxxxxxxxx6789for the next step.
- You can generate the header with a command line tool or a basic authentication tool such as Mixed Analytics. If using Mixed Analytics, enter the token into their encoding tool using the format
Step 1: Create a secret in Cortex
- Navigate to the Secrets page and click Add secret.
- In the modal, configure the secret:
- Name: Enter a descriptive name, such as
Jenkins. - Tag: Enter a unique identifier for the secret.
- Secret value: Enter the base64-encoded authentication header you generated in the previous step.
- Name: Enter a descriptive name, such as
- Click Create secret.
Step 2: Create a workflow
- In the main nav of Cortex, click Workflows.
- Follow the steps of the Workflows documentation to start creating a workflow from scratch and configure its settings.
- Give the workflow a descriptive name such as "Kick off Jenkins pipeline."
- In the Response template field you can pass a blank response body or use Mustache templating to create messages depending on what the user enters in each field.
Step 3: Add actions to the workflow
-
- In the workflow, click + to add an action. Select User input. Configure the action:
- Action name: Enter a name for the action (e.g.,
User input). - Slug: The slug field is automatically populated based on the action name.
- Under "User input fields," click Add input. Configure the input:
- Type: Choose
Select. - Name: Enter your parameter name from Jenkins (e.g.,
Environmentfrom the example earlier on this page). - Data source: Select
Manual. - Options: Add options for the parameter (e.g.,
Prod,UAT, andDEVfrom the example earlier on this page). - At the bottom of the modal, click Add input field.
- Type: Choose
- Click Save action.
- In the workflow, click + to add another action. Select HTTP request. Configure the action:
- Action name: Enter a name for the action (e.g.,
HTTP request). - Slug: The slug field is automatically populated based on the action name.
- HTTP method: Select
POST. - URL: Enter your Jenkins URL instance followed by
{{context.entity.tag}}/buildWithParameters.- For example:
https://jenkinsinstance.example/job/{{context.entity.tag}}/buildWithParameters - Adding
{{context.entity.tag}}makes sure that an entity's tag in Cortex matches the jobs in Jenkins. Using this dynamic URL allows you to template this step rather than needing to create a unique step for each entity. If you usecontext.entityin your URL, make sure you have configured your workflow settings scope toEntityand configured an entity filter as described in the workflow docs under Configure your workflow settings.
- For example:
- Headers: Enter the following key/value pairs:
- Header Key:
Authorization, Header Value:Basic {{{context.secrets.jenkins}}}- If you used a different tag for your secret, replace
jenkinswith your secret's tag.
- If you used a different tag for your secret, replace
- Header Key:
- Payload: Build the payload by referencing the outputs of the "User input" action (e.g.,
{ environment: "{{actions.input.outputs.environment}}" }).
- Action name: Enter a name for the action (e.g.,
- Click Save action.