

SCIM role provisioning is in Private Beta and is only available for Microsoft Entra ID. To request access, contact your Cortex account team.
How role provisioning works
Entra ID sends each user’s role values to Cortex, and Cortex turns those values into Cortex roles. A few things to keep in mind:- Users get every role their values map to. A user with several values gets all of the matching roles. You can map several values to one role, and one value to several roles.
- The fallback role covers everyone else. A user whose values don’t match any role, or who has no values, gets the fallback role you choose. If you don’t choose one, the fallback role is User.
- Your IdP becomes the source of truth. While role provisioning is on, you can’t change a user’s roles in Cortex. Make role changes in Entra ID instead.
Automatic mapping
Cortex maps a value automatically when it exactly matches one of the following:
Matching is case-sensitive. For example,
manager doesn’t match MANAGER. If you add your own mapping for a value, your mapping replaces the automatic one.
Prerequisites
- Entra ID SCIM is configured, and users are provisioning to Cortex.
- Both Enable automatic provisioning of users and Enable automatic deprovisioning of users are turned on in SCIM settings. If you turn either one off later, role provisioning turns off too.
- You have the
Configure Open ID Connector & SCIMpermission to change SCIM settings and theEdit Rolespermission to map roles. Both are included in the Admin role. - In Entra ID, you’re logged in as an Application Administrator, Cloud Application Administrator, or Global Administrator.
Step 1: Creating app roles in Entra ID
Create one app role for each role value you want to send to Cortex.- Log in to the Microsoft Entra Admin Center at https://entra.microsoft.com.
- Navigate to Entra ID > App registrations, then open your Cortex SCIM application.
- From the left menu, select App roles.
- Click + Create app role, then complete the following fields:
- Display name - The name of the role.
- Allowed member types - Select Users/Groups.
- Value - The role value.
- Description - A short description of the role.
- Click Apply.
Step 2: Adding a roles attribute mapping in Entra ID
Choose the mapping that fits how you assign roles.- In the Entra Admin Center, navigate to Entra ID > Enterprise apps, then open your Cortex SCIM application.
- From the left menu, select Provisioning.
- Under Manage, select Attribute mapping. The Users tab opens by default.
- Follow the steps for one of the options below.
One role per user
One role per user
Use this option when each user has a single app role and its name matches a Cortex role.
- Click + Add attribute mapping.
- From the Mapping type dropdown, select Expression.
- In the Expression field, enter
SingleAppRoleAssignment([appRoleAssignments]). - From the Target attribute (customappsso) dropdown, select
roles[primary eq "True"].value. - Click Add, then click Save.
Multiple roles per user
Multiple roles per user
Use this option when users can have more than one app role.
- Click Advanced options, then select Edit customappsso user attributes.
- Scroll to the bottom of the list, then click + Add new attribute.
- Enter
rolesas the name, select the Multi-value checkbox, then click Save. - On the Attribute mapping page, click + Add attribute mapping.
- From the Mapping type dropdown, select Expression.
- In the Expression field, enter
AppRoleAssignmentsComplex([appRoleAssignments]). - From the Target attribute (customappsso) dropdown, select
roles. - Click Add, then click Save.
Step 3: Assigning app roles to users in Entra ID
- In the Entra Admin Center, navigate to Entra ID > Enterprise apps, then open your Cortex SCIM application.
- From the left menu, select Users and groups.
- Click + Add user/group.
- Select the user or group, select the role, then click Assign.
Step 4: Mapping role values in Cortex
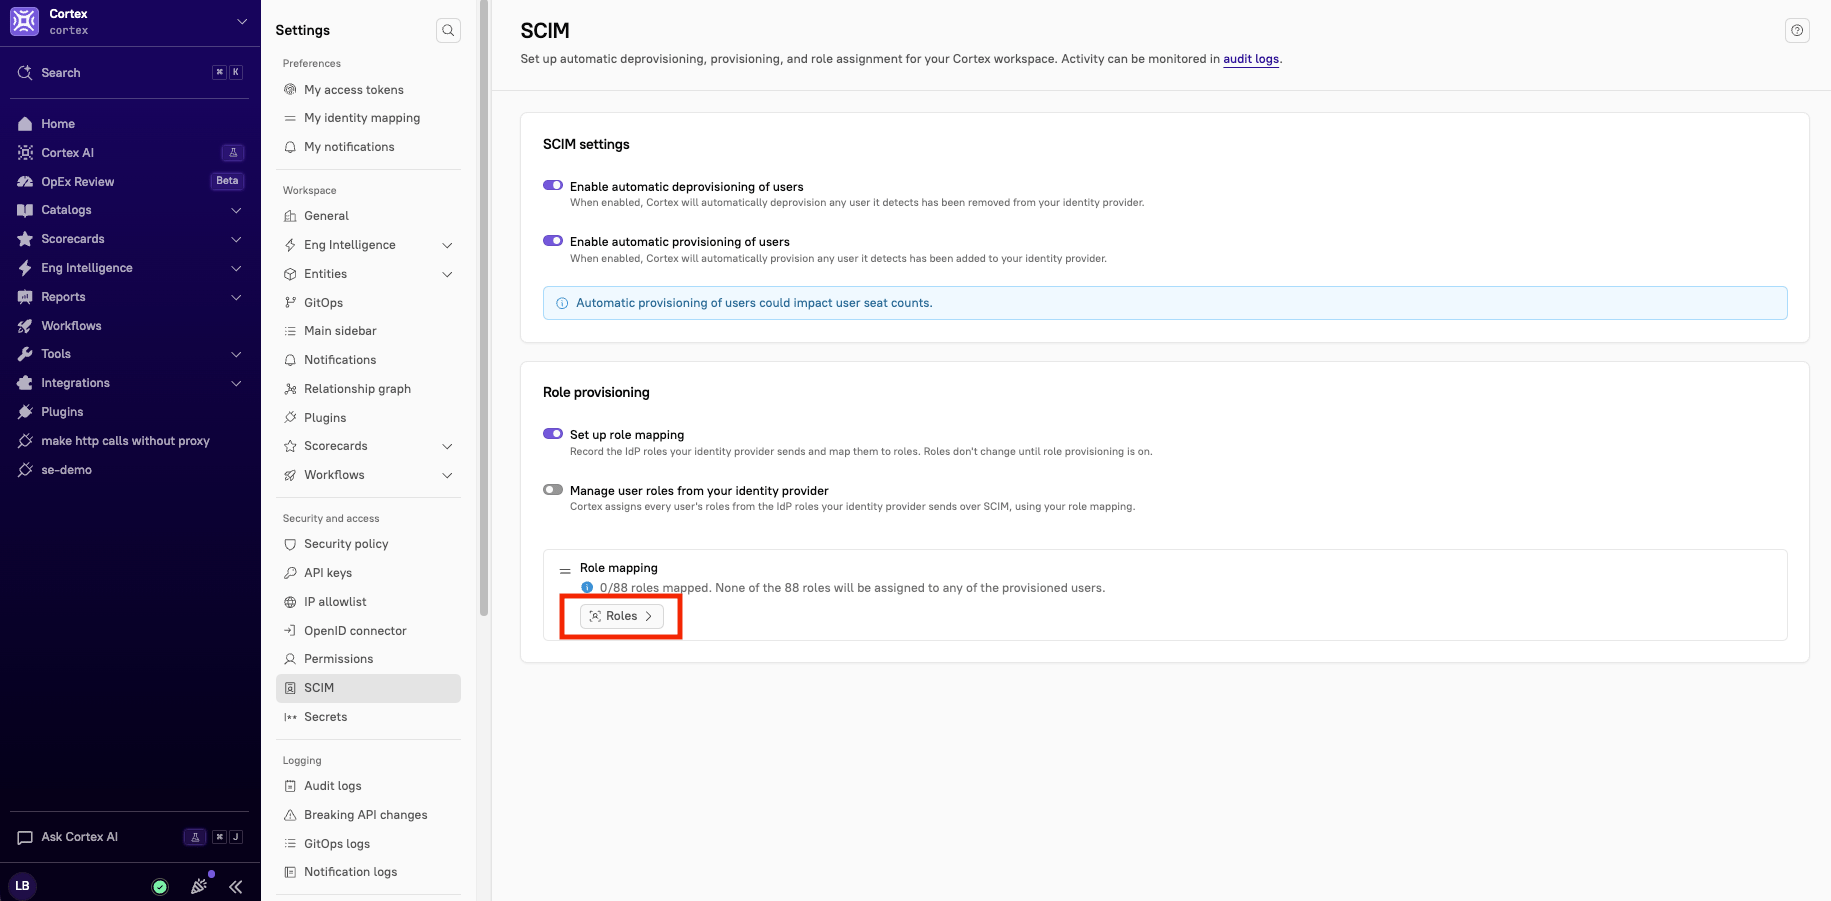
Turn on role mapping setup first. During setup, Cortex records the role values Entra ID sends, but doesn’t change anyone’s roles. This lets you finish your mappings before they take effect.- In Cortex, click your avatar in the bottom-left corner of the main sidebar, then select Settings.
- From the Settings menu, scroll to the Security and access section, then select SCIM.
- Toggle on Set up role mapping.
- Click the Roles button. The Permissions page opens on the Roles tab.
- Review the banner at the top of the tab. It lists the values Entra ID has sent that don’t match a role yet, and how many users have each one. Click Show all to see the full list.
- On a role’s card, click Add IdP role to add the value(s) that should grant that role. You can choose an unmatched value, choose a value that’s already mapped to another role, or type a new value.
auto on the role’s card and can’t be removed. If every value you send matches a Cortex role automatically, you don’t need to add any mappings.

Cortex lists a value only after Entra ID has sent it for at least one user. If you already know a value that Entra ID will send, type it in to add the mapping before any user is provisioned with it. To make a missing value appear in the list, provision a user who has that app role on demand.
Step 5: Turning on role provisioning
Turning on role provisioning replaces roles for everyone in your workspace, and only users provisioned through SCIM can log in. Before you continue, make sure everyone who needs access, including admins, is assigned to your Cortex SCIM application in Entra ID. For details, see what changes.
- From the Settings menu, scroll to the Security and access section, then select SCIM.
- Toggle on Manage user roles from your identity provider.
- Click the Roles button. The Permissions page opens on the Roles tab.
- On the Fallback role card, select the role for users whose values don’t match any role. The default role is
User. You can change the fallback role at any time.
What changes when role provisioning is on
- Roles from Entra ID replace manually assigned roles. A user’s existing roles are removed and replaced with the roles their values map to.
- Only users provisioned through SCIM can log in. Anyone who isn’t assigned to your Cortex SCIM application in Entra ID loses access to Cortex.
- You can’t edit users’ roles in Cortex. User rows on the Permissions tab are locked, and bulk role actions aren’t available. The same applies to the Cortex API.
- Mapping changes apply right away. When you add or remove a value on the Roles tab, Cortex updates every user who has that value. If you remove a user’s only matching value, they get the fallback role.
- You can’t delete a custom role that has a value you mapped to it. Remove the value from the role first. A custom role that only has an automatic mapping can still be deleted.
- You can still delete users. Deleting a user in Cortex works the same way as before.
Turning off role provisioning
Turn off role provisioning in SCIM settings at any time. Users keep the roles they have, and you can edit roles in Cortex again. Role mapping setup can only be turned off after role provisioning is off.- From the Settings menu, scroll to the Security and access section, then select SCIM.
- Toggle off Manage user roles from your identity provider.