> For the complete documentation index, see [llms.txt](https://docs.cortex.io/llms.txt). Markdown versions of documentation pages are available by appending `.md` to page URLs; this page is available as [Markdown](https://docs.cortex.io/configure/settings/workspace-customization.md).
# Customizing your workspace
Cortex is built around customization, and the plugin framework extends this to the appearance of your workspace.
## Customizing the look of Cortex
Users with the `Configure Appearance Settings` permission can adjust workspace appearance settings.
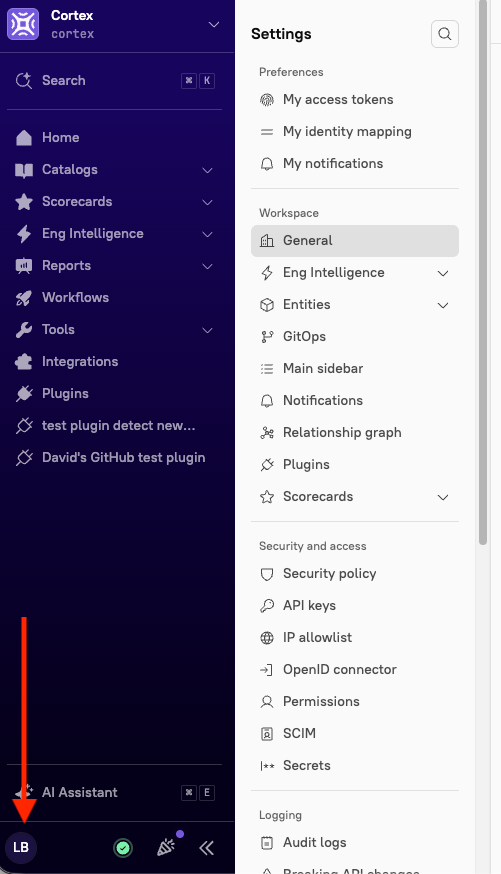
1. From the main sidebar, click your avatar in the bottom-left corner.
2. Click **Settings**.\
The *General* settings page is displayed.
3. Do any or all of the following:
1. View your organization's billing information, including user login information.
2. Upload your organization's logo. The recommended minimum file size to display the logo in the expanded navigation is `200px x 80px`, and `80px x 80px` for collapsed navigation.
3. Edit your organization's workspace name.
4. Edit your organization's workspace brand colors. Note that this be a hex code, e.g. #800080.
4. Click **Save changes**.
## Customizing the main sidebar
* Users with the `Configure Appearance Settings` permission can adjust workspace appearance settings.
* Users with the `Configure Plugin Appearance` permission can configure where plugins appear.
Follow the steps below to reorder the main sidebar, controlling which catalogs and plugins appear and in what order.
1. From the main sidebar, click your avatar in the bottom-left corner.
2. Click **Settings**.
3. Select the **Main sidebar** tab.
4. From the **Catalogs** tab, do the following:
1. Locate the catalog you want to reorder.
2. Hover over the **grip icon** and drag it to the desired position.
5. From the **Plugins** tab, do the following:
1. Locate the plugin you want to reorder.
2. Hover over the **grip icon** and drag it to the desired position.
3. To remove a plugin from the main sidebar, click the **trash icon** next to it.
4. To add a plugin to the main sidebar, click the *Select plugins* drop-down menu and select the plugin you want to add.
A maximum of 5 plugins can be displayed in the main sidebar. If 3 or more are selected, they are nested under **Plugins**. Note that only plugins with a global context appear in the main sidebar.
6. Click **Save changes**.
{% hint style="info" %}
For more information on customizing where plugins appear in Cortex, see [Viewing plugins](/streamline/plugins.md#viewing-plugins).
{% endhint %}