

Step 1: Configure an app in your single sign-on provider
- Create an app in your SSO provider to be used for Cortex.
- Set the redirect URL to be
http(s)://[CORTEX BACKEND HOST]/login/oauth2/code/[PROVIDER],- for example, on Cortex Cloud, the Okta URL would be
https://api.getcortexapp.com/login/oauth2/code/okta. Other common provider values include:- Amazon SAML -
amazon - Azure Active Directory -
azuread - Google SSO -
google - JumpCloud SAML -
jumpcloud - Okta SSO -
okta - Generic OIDC -
auth0
- Amazon SAML -
- for example, on Cortex Cloud, the Okta URL would be
- Copy the client ID, client secret, and issuer URI. Store these in a secure location, as you will need them int he next steps.
Step 2: Configure the provider in Cortex
- In Cortex, navigate to Settings > OpenID Connector.
- Configure the OIDC form:
- Type: Select your SSO provider.
-
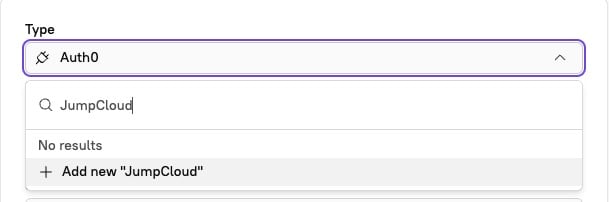
If your provider is not listed, type its name into the Type dropdown then click +Add new.
-
If your provider is not listed, type its name into the Type dropdown then click +Add new.
- Identifier: Enter your client ID.
- Secret: Enter your client secret.
- Issuer: Enter your Issuer URI, e.g.,
https://{your-org}.okta.com.- For Okta, if you are using the default authorization server then your Issuer will be
https://{your-org}.okta.com/oauth2/default.
- For Okta, if you are using the default authorization server then your Issuer will be
- Type: Select your SSO provider.
- At the bottom of the page, click Save.
If the Cortex settings screen doesn’t include the provider you’re using, just select any of the providers in the dropdown. Change the redirect URL in step 2 to include the provider you chose, like
okta, even if your provider is not the same.This process uses standard OIDC.Disabling Single Sign-On
If you misconfigured your SSO setup, you can disable auth again by connecting to the database for your Cortex instance and runningDELETE FROM oidc_client_secret_basic_connections;. After doing this, refresh the page to log back in.