- Active incidents - Any ongoing incidents are surfaced at the top of the page for immediate visibility.
- Sidebar - Customize which metadata appears here by pinning the information most relevant to you. Supported data includes on-call schedules, owners, Slack or Microsoft Teams channels, groups, repositories, entity relationships, doc links, project management, custom data, and code quality.
Fields only appear in the overview if data is available. For example, the Slack channels field won’t display unless you have the Slack integration configured.
Locating an entity’s unique identifiers
The Cortex tag and the Cortex ID are displayed below the entity’s name.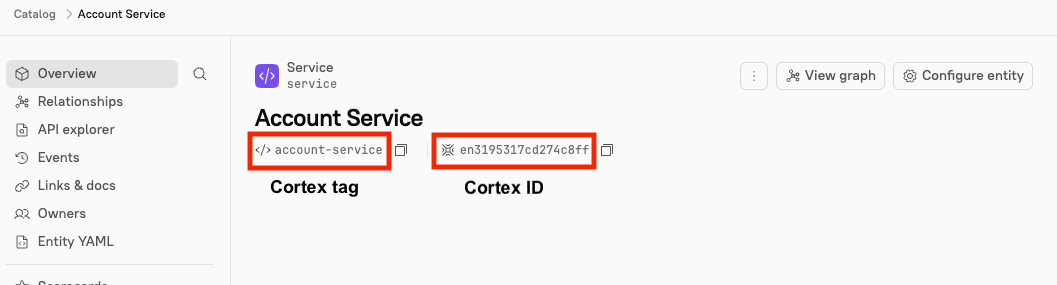
Configuring the entity’s sidebars
Each entity details page includes two sidebars—the entity details sidebar on the left and the entity metadata sidebar on the right—each serving a distinct purpose.Configuring the entity details sidebar
The entity details sidebar appear on the left side of every entity page. It provides a deeper view into the entity’s recent deploys, events, security vulnerabilities, monitoring metrics, and more, giving you the context needed to resolve incidents quickly. The entity details sidebar contains the following information about the entity:Overview categories
- Relationships - See how an entity connects to the rest of your catalog including domain hierarchy, team hierarchy, dependencies, and any custom relationship types you’ve defined. See Defining relationship types and Viewing relationships on an entity page.
- API explorer - Pulls from API documentation added to your entity.
- Events - A list of recent events sourced from deploys, AWS ECS, Azure DevOps, GitHub, GitLab, Kubernetes, Opsgenie, PagerDuty, Sentry, and Snyk.
- Links & docs - Documentation links you have added to the entity, along with documentation pulled from the related repository.
- Owners - See the teams and individuals who own the entity, the related Slack or Microsoft Teams channels, and a list of team members. Channels are contacts for the owners, not owners themselves. Learn more about defining entity owners.
- Entity YAML - View the entity YAML that defines the selected entity.
- If you have GitOps editing enabled for this entity, and you have the
View GitOps logspermission, this page displays the source of the YAML file and a preview of the latest GitOps log.
- If you have GitOps editing enabled for this entity, and you have the
Cortex features
- Scorecards - A list of any Scorecards that are in progress where this entity is being scored. Additionally, see the average score, median score, and a graph showing the entity’s scores over time.
- Above the Scorecard section, you can choose which scores to include in calculations if the entity is in a hierarchy:
- Domains - Click This entity only to view only the scores that apply to the domain you are viewing. Select Include entity’s children to include both the parent domain and its child entities in the score calculations.
- Entities with a custom relationship type - Click This entity only to view only the scores that apply to the entity you are viewing. Click [Relationship type] only to include both the parent and its child entities in the score calculations.
- Teams - Click This entity only to view the scores that apply only to the team you are viewing. Click Include entity’s children to include scores for the team, the team’s children, entities owned by the team, and entities owned by the team’s children.
- Above the Scorecard section, you can choose which scores to include in calculations if the entity is in a hierarchy:
- Initiatives - A list of all active Initiatives for this entity, including the Scorecard’s current level and the due date of the Initiative.
- Workflows - A list of Workflows that include this entity.
- If you are a designated approver for any pending Workflows, they will appear at the top of this page. You can also view recently run Workflows and trigger any related Workflows from here.
Connections
The Connections section displays integration data grouped by context. Once you configure integrations, data appears in the following sections on the entity page:- CI/CD - Pulls from deploys API, Azure DevOps, Bitbucket, Buildkite, CircleCI, GitHub, and GitLab.
- Cloud - Pulls from AWS and Kubernetes. The AWS section appears only on entities that have an
AWS::ECS::Serviceresource linked in theirx-cortex-infrablock. See Viewing AWS data on an entity. - Code quality - Pulls from Codecov and SonarQube.
- Custom data & metrics - Pulls from custom data and Eng Intelligence custom metrics.
- Dashboard - Pulls from charts configured in the entity’s YAML file for Datadog, Grafana, and New Relic.
- Error tracking - Pulls from BugSnag, Rollbar, and Sentry.
- Feature flags - Pulls from LaunchDarkly.
- Observability - Pulls from Coralogix, Datadog, Dynatrace, Google Observability Cloud, Lightstep, New Relic, Prometheus, Splunk Observability Cloud (formerly SignalFX), and Sumo Logic.
- On-call & incidents - On-call information from Opsgenie, PagerDuty, Splunk On-Call (formerly VictorOps), and xMatters, and incidents pulled from incident.io, PagerDuty, FireHydrant, and Rootly.
- Packages - Pulls from the packages API and any packages automatically discovered from your configured git repositories.
- Project management - Pulls from Azure DevOps, ClickUp, GitHub, GitLab, and Jira.
- Security - Pulls from Apiiro, Checkmarx, Codecov, GitHub, GitLab, Mend, Semgrep, Snyk, SonarQube, Veracode, and Wiz.
- Version control - Pulls from Azure DevOps, Bitbucket, GitHub, and GitLab.
Plugins
The Plugins section displays plugins that are relevant to this entity.Configuring the entity metadata sidebar
The entity metadata sidebar appears on the right side of every entity page. You can control which metadata categories are displayed, reorder them, and apply the same layout across multiple entity types at once.Expanding or collapsing the metadata sidebar
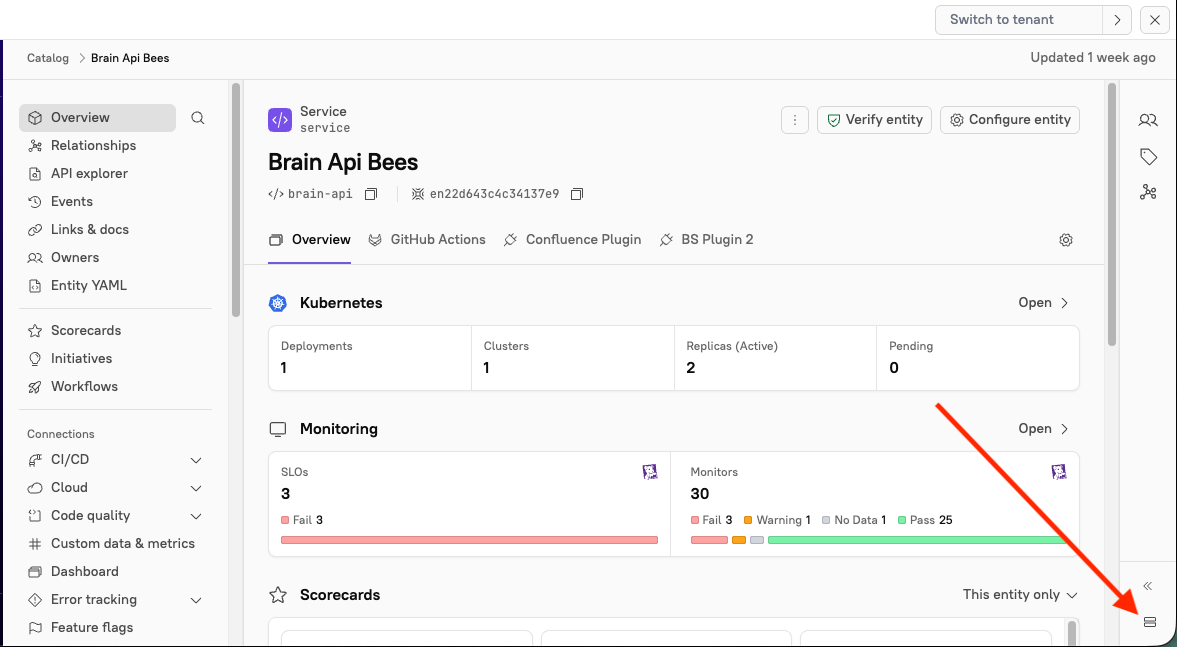
Click the arrow icon in the bottom-right corner to expand or collapse the metadata sidebar..png?fit=max&auto=format&n=OnaYqLHqq-U_XM2R&q=85&s=c414bf74a450e476b3e96fa7b84da804 "Expand Metadata Sidebar (1)")
Customizing the metadata sidebar
Users who are admins or who have theEdit Entity Types permission can customize the metadata sidebar.
- In the bottom-right corner of the metadata sidebar, click the Configure entity sidebar icon.
- To reorder a category, hover over the grip icon and drag it to the desired position. To hide a category, click the eye icon next to it. Repeat as necessary.
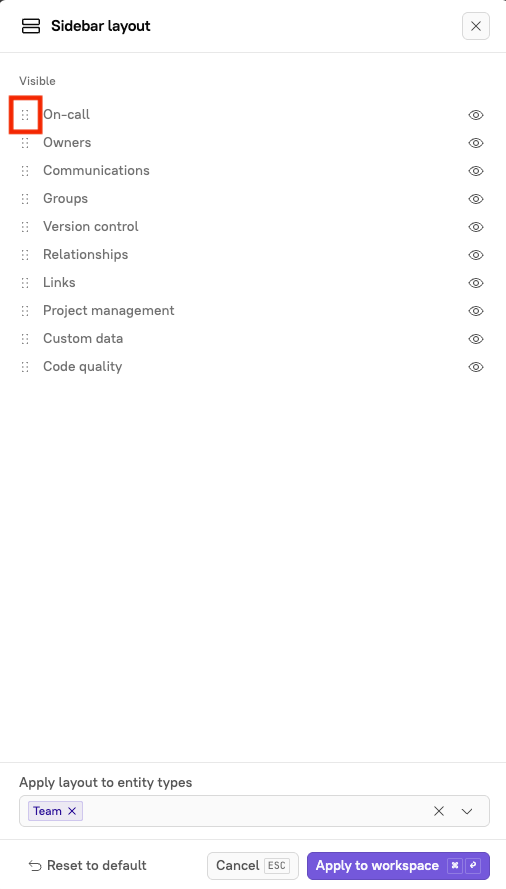
- From the Apply layout to entity types drop-down menu, select which entity types to apply this configuration to.
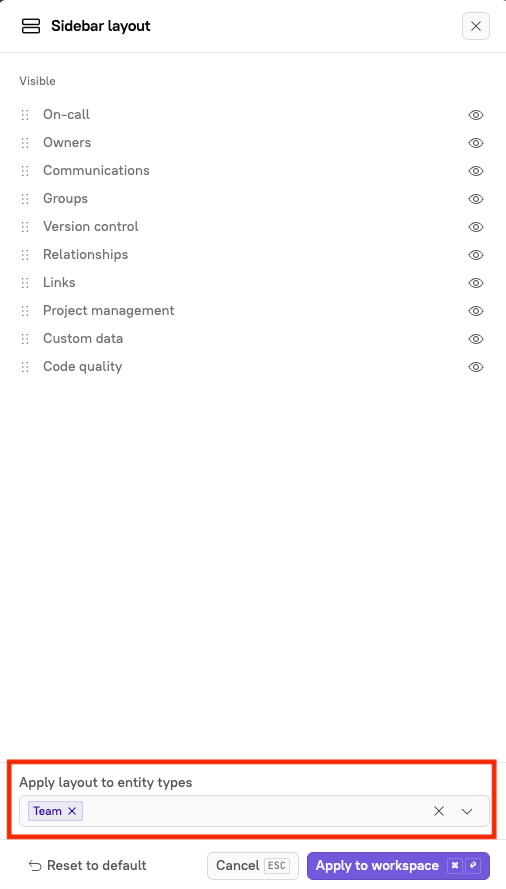
- Click Apply to workspace.
Customizing entity page plugin tabs
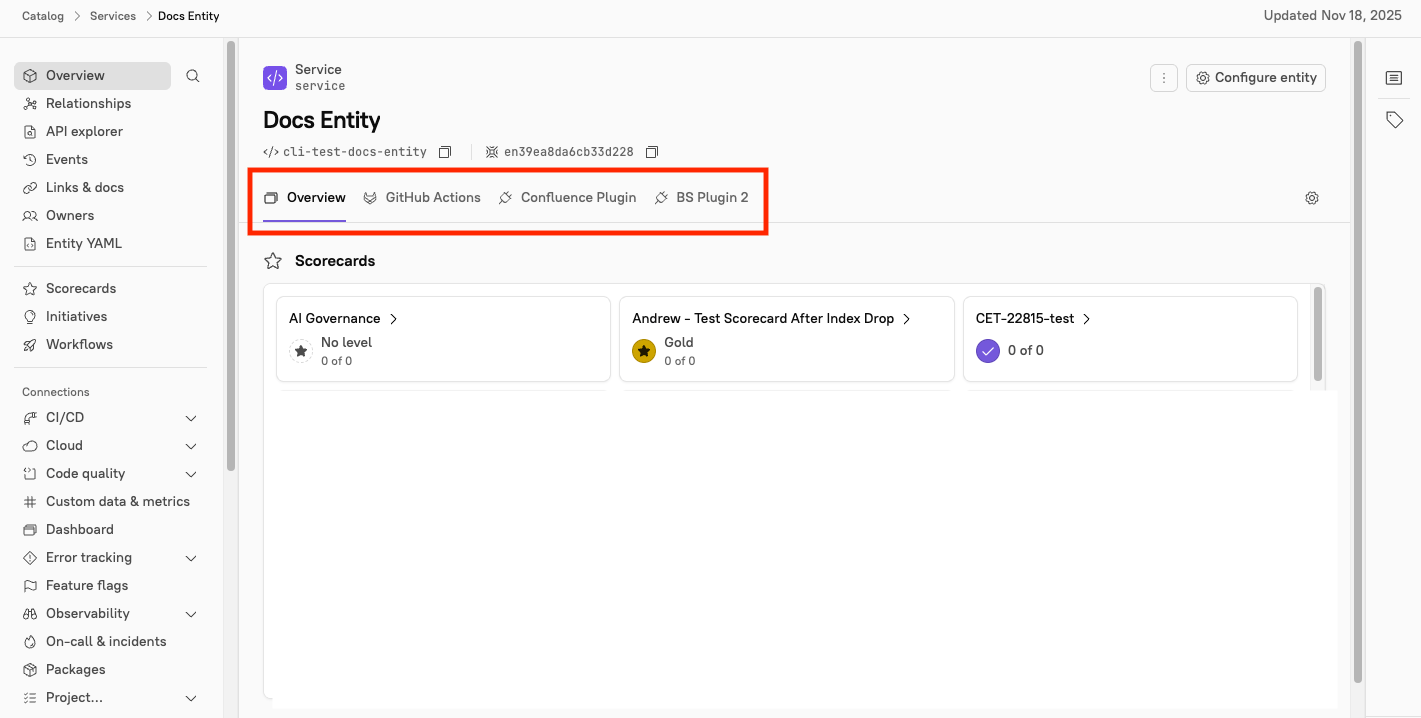
Users with theEdit Entities permission can pin, reorder, and hide plugins on an entity’s details page. Plugins pinned this way appear as tabs at the top of the page, either on a single entity or across all entities of the same type.
Before a plugin can be pinned, it must be configured to include the relevant entity type in its context. For example, to pin a plugin on a Teams entity page, include the team entity type when registering the plugin in Cortex.
System-level tabs are always visible by default but can be reordered. Most entity types only have the Overview tab, though some have more. For example, Teams entity pages include both the Overview and Entities tabs. Applicable plugins are also visible by default and are appended to any existing tab configuration.
team entities, the Engineering page keeps its original configuration.
To pin and reorder plugins:
- Navigate to the entity.
- On the entity details page, click the gear icon.
The Edit tabs side panel opens. When there are too many pinned tabs to fit across the page, the gear icon moves into the overflow menu. Click the overflow menu icon to access it.
 - To reorder a plugin, hover over the grip icon and drag it to the desired position. To hide a plugin, click the eye icon next to it. Repeat as necessary. There is no limit to the number of plugins you can pin to an entity page. If you have more pinned plugins than can fit across the page, the remaining tabs are accessible via the Overflow menu.
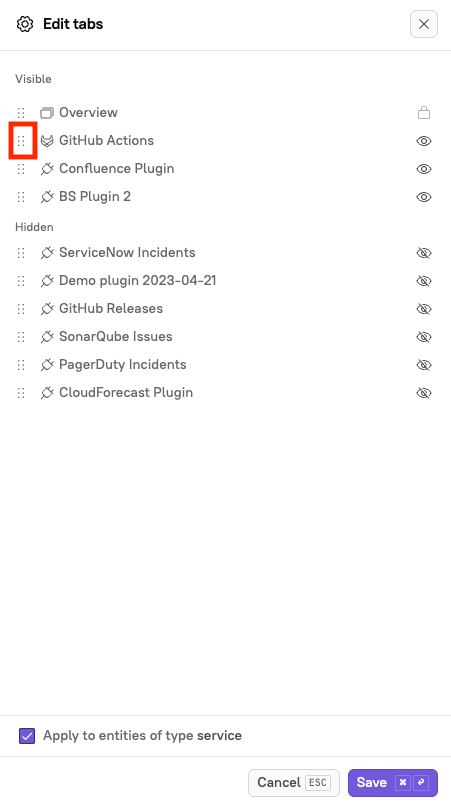
- To apply the layout to all entities of the same type, select the Apply to entities of type service checkbox.
- Click Save.
The plugin is pinned to the top of the entity details page.